I’ve been learning more about Vespa, an open source search engine originally developed to serve and search huge amounts of content and traffic at Yahoo! and now developed by a spinout company. Vespa is hugely flexible and powerful and I’ve been lucky enough to have been given a look behind at the scenes at some of what the team there are building – hopefully I’ll be able to write more about this soon. In the meantime I’ve been learning more about what Vespa can do and how to use it – which has sometimes been a challenge, as it has a very different foundation and approach compared to the Lucene-based engines I’m most familiar with.
As an exercise, I decided to see if I could hack together a proof of concept for connecting Vespa to Quepid, the offline search relevance tool. You might remember a previous blog and talk based on how to hack Quepid to work with various websites using its generic search API capabilities – get ready for more of my rough Javascript!
Setting up a sample application in Vespa
My first idea was to self-host Vespa on my laptop – unfortunately that won’t work, as Quepid can’t connect to a HTTP server running there. Luckily Vespa offers $300 of free credits for their cloud offering, so I could spin up a developer instance for Quepid to talk to. I chose the Music example which is a basic 5 document index of albums from artists including Coldplay and Metallica (for some reason I expected them all to be heavy metal, but that may just be because the Vespa team are mainly Norwegian :).
Vespa is deployed as an application encompassing various configuration files. This startup guide shows you how to install Docker and then download a command line interface which runs on Windows or Linux and allows you to connect to the cloud instance to carry out the various operations you’ll need. I used Windows Powershell for this step and very quickly had the sample Music application up and running on Vespa Cloud, with the 5 documents indexed and searchable.
Authenticating Quepid for Vespa queries
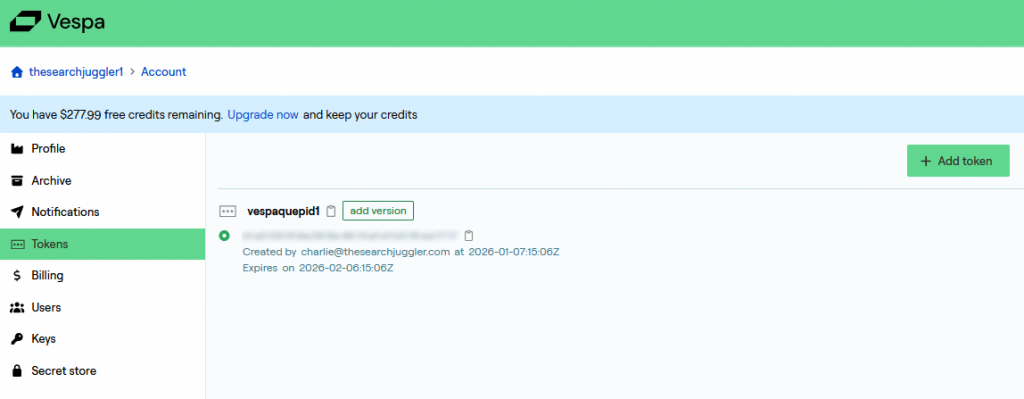
The startup guide above shows how to create a self-signed certificate for authentication with the Vespa Cloud data plane, which also allows you to query the index from the Vespa CLI. However, Quepid can’t use this certificate so I had to find a different method – token-based authentication. The token can be sent by Quepid as a HTTP custom header. Using the Vespa cloud console I created a new token, carefully copying the token value as I created it (you only get one chance to do this!):
The next step is to reconfigure the Vespa application to allow token-based access. One key thing to remember about Vespa is that every configuration change requires re-deployment of the Vespa application. While following the original startup guide I downloaded the application package to my laptop, so I could now edit the configuration file services.xml, adding the following block inside the <container> block:
<clients>
         <client id="query-token-client" permissions="read">
            <token id="vespaquepid1"/>
        </client>
        <client id="mtls" permissions="read,write">
            <certificate file="security/clients.pem"/>
        </client>
</clients>
Note there are two sections here:
- The first block allows read-only access using the token I created in the previous step
- The second block allows both read and write access from my laptop – this was enabled by default when I ran the startup scripts above, but for some reason no
<clients>block was originally required. However once this block does exist inservices.xmlit must also contain another<client>definition for the key-based access. Just adding the first block, and re-deploying the application, stopped me being able to query the index from the Vespa CLI.
Next we have to re-deploy the Vespa application. There is a way to kill off the existing application using the Vespa CLI but I chose to just delete it from the cloud console. To re-deploy you need to follow these steps from within the folder containing your application (this is in Powershell with paths removed for clarity):
vespa auth cert -f
vespa deploy --wait 600
vespa feed ../dataset/documents.jsonl
This makes sure you have the right local certificates (I’m not sure this step is necessary but it worked for me), re-deploys the application with the modified services.xml and re-uploads the documents for indexing. Just to make sure it’s working I tried a query using cURL in a different window (actually a Linux shell running in Windows, which I was pretty sure wouldn’t have the keys the Vespa CLI had access to). This included the authentication token I’d carefully copied down above (it’s the bit I’ve shown here as vespa_cloud_XXXXXXX) and the URL of the application, which you can copy from the Vespa Cloud console:
$ curl -H "Authorization:Bearer vespa_cloud_XXXXXXX" https://[my_vespa_cloud_url_id].vespa-app.cloud/search/?yql=select+%2A+from+music+where+album+contains+%22head%22

{"root":{"id":"toplevel","relevance":1.0,"fields":{"totalCount":1},"coverage":{"co
verage":100,"documents":5,"full":true,"nodes":1,"results":1,"resultsFull":1},"chil
dren":[{"id":"id:mynamespace:music::a-head-full-of-dreams","relevance":0.163438790
32006287,"source":"music","fields":{"sddocname":"music","documentid":"id:mynamespa
ce:music::a-head-full-of-dreams","artist":"Coldplay","album":"A Head Full of Dream
s","year":2015,"category_scores":{"type":"tensor<float>(cat{})","cells":{"pop":1.0
,"rock":0.2,"jazz":0.0}}}}]}}
Success! Back comes a block of JSON. Note the query language – YQL, a variant of SQL, and the URL encoding of various quote characters.
A custom Quepid Endpoint for Vespa
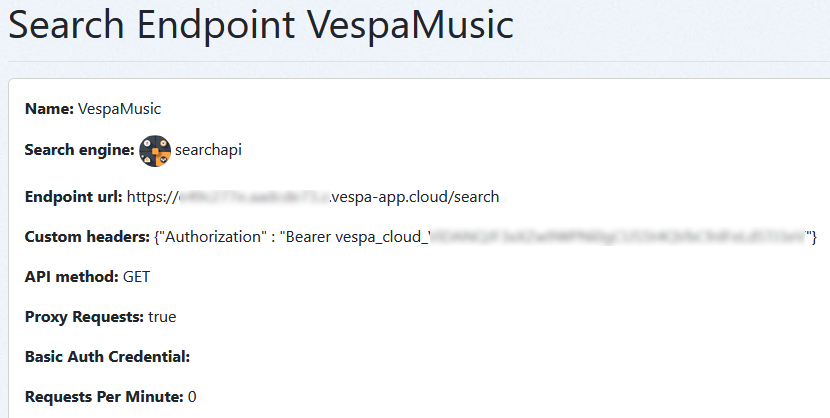
Now we know we can get results back from our Vespa application via a HTTP call, we can set up a Custom Search API endpoint in Quepid. To do this we need to add an URL and the custom headers containing the authentication token, then parse whatever comes back from Vespa. To figure out this bit I used the Developer Console while creating the Javascript parsing code as in my previous blog. Here’s how to set up the endpoint, with the actual Vespa Cloud URL and token blurred (note the headers need to be entered in JSON, which isn’t obvious from the Quepid documentation):
Next is to parse the returned JSON, for which I added this script to the Endpoint definition:
numberOfResultsMapper = function(data){
 str = JSON.stringify(data);
 const obj = JSON.parse(str);
 return obj.root.fields.totalCount;
};

docsMapper = function(data){
 str = JSON.stringify(data);
 console.log(str);
 const obj = JSON.parse(str);
 count = obj.root.fields.totalCount;
 let docs = [];

 if (count>0) {
  for (let child of obj.root.children) {
	docs.push ({
    	  id: child.id,
    	  title: child.fields.album,
 	  artist: child.fields.artist,
          year: child.fields.year,
 	  score: child.relevance
   });
  }
}
return docs;
};
We now need to create a Quepid Case using this endpoint (make sure you create a Quepid Team to share both the Endpoint and Case so they can work together properly). In the Tune Relevance panel I set up a query in Vespa’s YQL format, incorporating the special token that is replaced by each query string in a Case:
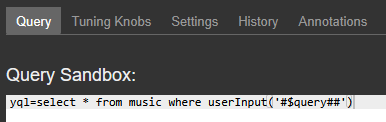
I also used these Settings:
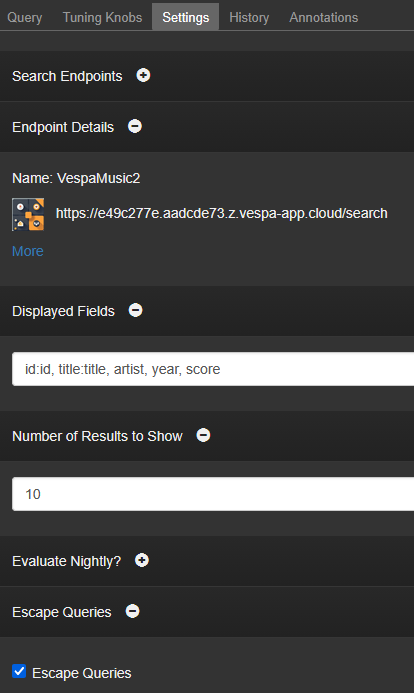
and finally, we can send queries to Vespa and show the results:
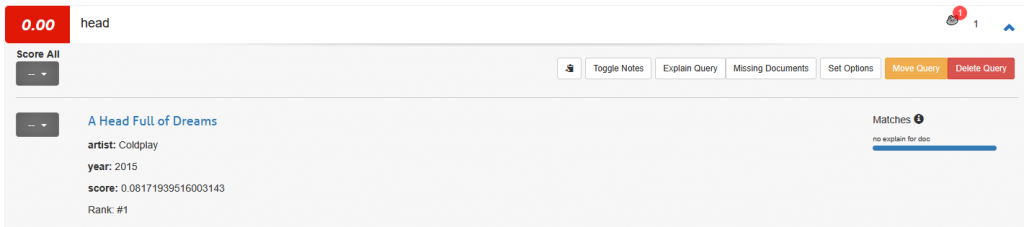
Next steps & conclusion
The example above is very simple and doesn’t contain a lot of interesting data, so it’s hard for example to try queries that return more than one document. It would also be interesting to try more complex YQL queries (note that since this was originally developed at Yahoo!, the syntax can be a little odd in parts). I’m also wondering if the ratings one can enter into Quepid could be exported and fed back into Vespa as training data, as Vespa supports a wide range of re-ranking options. This is very much the beginning of my journey with Vespa and I’m looking forward to trying more things out!
Vespa doesn’t have any ‘query workbench’ or inbuilt facility for offline testing and Quepid lets you easily try out problematic user queries, so it fills a gap for now. To make this kind of project easier, Quepid’s Endpoints have recently gained an AI-powered process for generating parsing scripts (although at the moment this doesn’t support Custom Headers so I couldn’t use it to write better Javascript).
It’s been fun learning more about Vespa and I’m sure there will be more to write about it soon!
If you need help deciding whether Vespa is the right engine for your project, get in touch.